Ecommerce businesses are quite competitive and always racing against time to keep up with customers’ demands.
In a time-sensitive business like eCommerce, customer satisfaction primarily depends on fast delivery. Besides, quicker and timely delivery also gives your business a competitive edge.
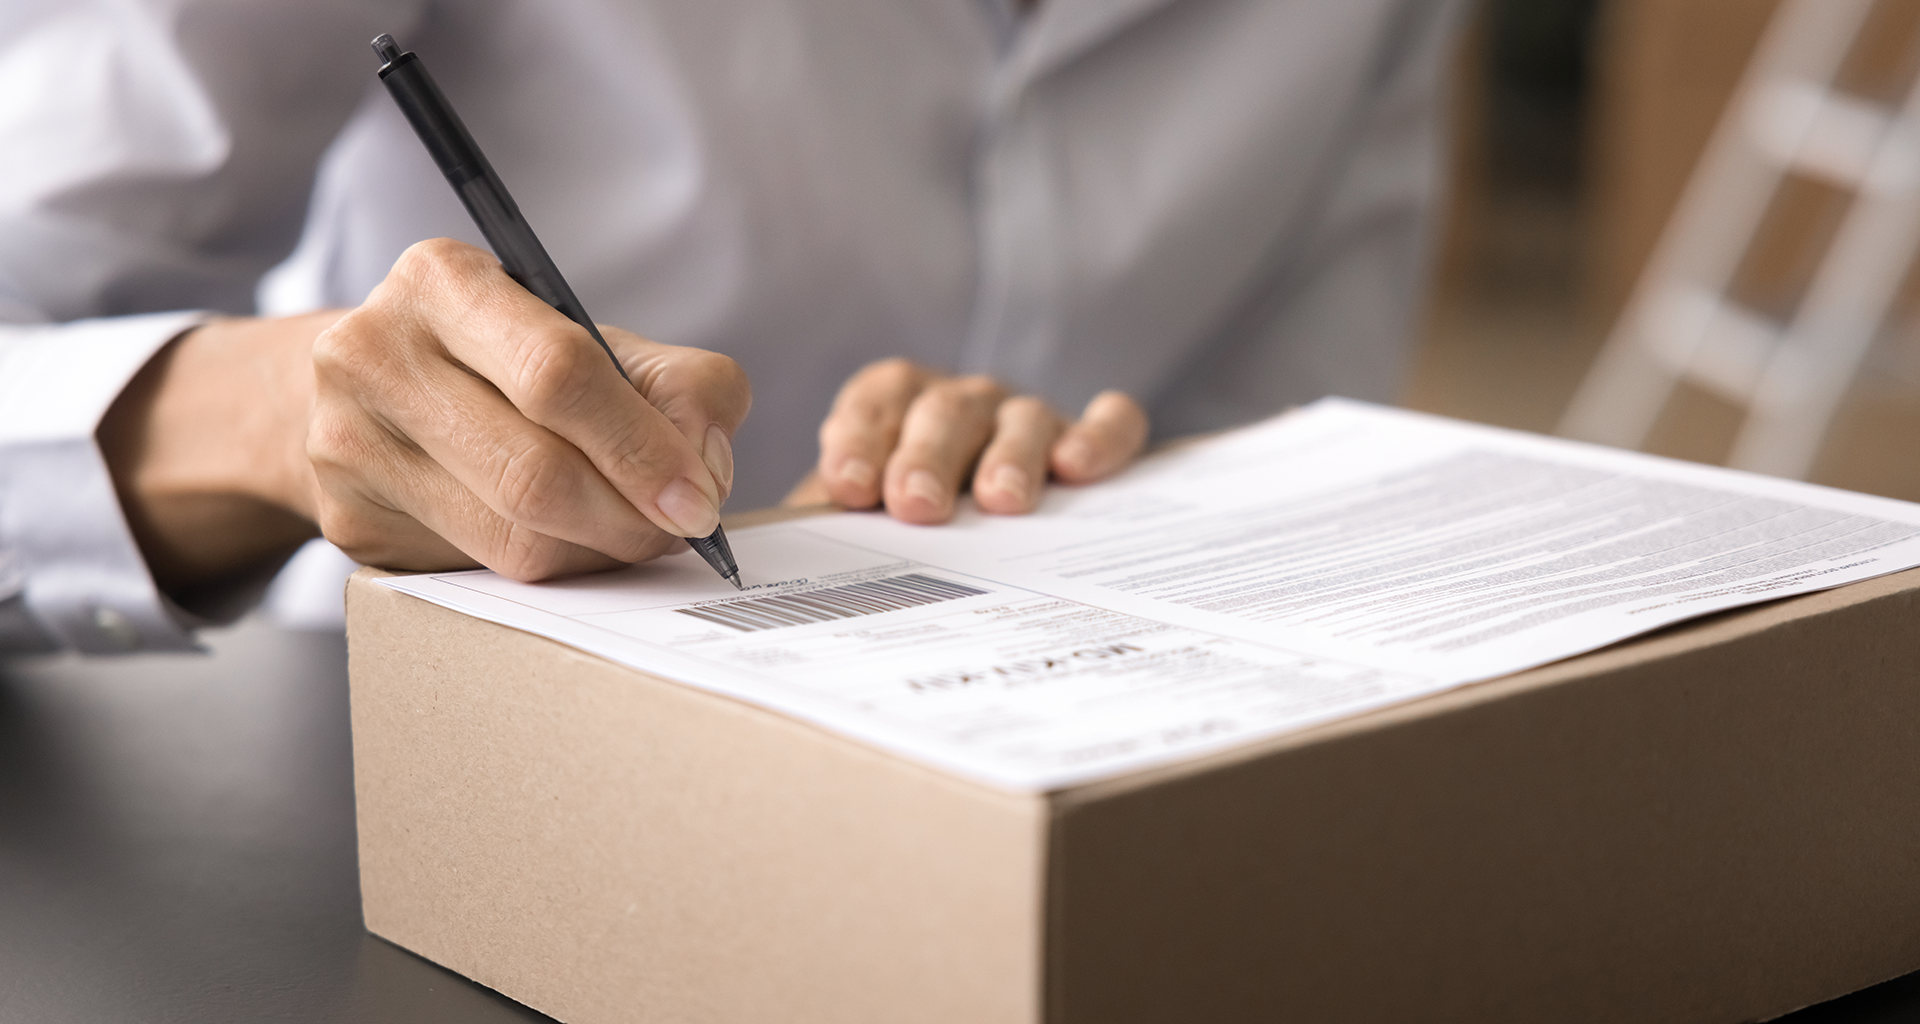
For fast shipping and timely deliveries, shipping labels play a key role for seamless logistics. Labels work as a vital communication tool between your business, carrier, and customers. They ensure that packages reach their destinations on time.
You need to streamline the labeling process for faster order fulfillment.
This article illustrates how to write a shipping label, its essential components, common mistakes to avoid, steps to create labels, and more.
Essential Elements of a Shipping Label
An eCommerce business generates or creates shipping labels to make sure its chosen shipping carrier delivers orders to customers accurately and on time.
A shipping label contains some important details, which are below:
- The customer’s shipping address
- The return address of the eCommerce company
- Space for signature
- Scannable barcode
- Article number
- Connote number
- Specific delivery instructions (e.g., leave the parcel with the neighbor next door)
- Package weight
- Postage paid or pending.
Most of the listed details above are mandatory to include in a shipping label, and they vary from one carrier to another.
Besides, for each carrier, shipping labels have a unique layout. If any essential information is missing or misplaced on the label, the carrier may refuse to accept the package, resulting in additional charges.
Guide to Writing a Shipping Label
The step-by-step guide on how to write shipping label is below:
1) Create and Generate a Shipping Label Online
You can make and generate shipping labels online through relevant websites by following the simple steps below:
a. Create the Consignment with a Carrier
This is the first step of creating a shipping label. Create a shipment with a shipping carrier, such as FedEx or UPS.
b. Choose a Shipping Label
After creating the consignment, go to “Manage Shipments” to download the correct shipping label. From the list of labels, select the boxes with the labels you need to download.
c. Download a Shipping Label
After selecting a shipping label format, click the “download” button.
d. Print the Shipping Label,
After downloading the shipping label, you can print one or more labels using a printer.
2) Generate Labels Using Your Carrier’s Shipping Template
Most leading carriers provide their shipping labels through their websites, where you can make and print a label. You need to fill out the customer information, download it, and print it on a sticky label.
Shipping Label – FedEx: FedEx is a global giant in the shipping business. You can create an account on the carrier’s website to generate shipping labels. After registering for a business account, you can get discounts and be part of the FedEx rewards program.
You can create and generate shipping labels even without an account. Put in the ZIP Codes for the package’s origin and destination, the number of packages to ship at a time, the type of packaging, the dimensions, and their weight. You also need to provide the contact number of the recipient.
Shipping Label – UPS: UPS is another leading carrier and offers a seamless shipping and package tracking system. You can start your shipping process by entering the ZIP codes of destination and origin, and the shipping address. After confirming the address, the UPS system lets you know various delivery options, such as UPS Ground, Second Day Air, Next Day Air, etc.
To generate a label, enter the shipment information, including the package type, its weight, and value. Also, include parcel content details, and print the label.
3) Use a Thermal Label Printer for Daily Needs
If you buy a thermal printer, it will be a long-term solution to your label printing needs. This investment will also save you the recurring cost of making and printing labels via a third party.
Direct thermal printers have chemically treated material and do not need any ink, ribbon, or toner for printing labels.
Other than cost-efficiency, a thermal printer saves significant time:
- If you have a dedicated thermal printer, you do not have to print using an inkjet or laser printer to generate labels.
- The occurrence of jamming is rare on a thermal printer since it has a straight path for printing.
- Using a thermal printer for printing shipping labels is a hassle-free process, as there is no smear and you no need to wait for the ink to dry, which saves time.
If you don’t want to bear the cost of a new printer, you can buy a refurbished one for a much lower price.
4) Use a Third-party Shipping Label Tool
For your labeling needs, you can use a third-party labeling tool. Having a streamlined process of creating shipping labels for your shipments can make your order fulfillment efforts seamless.
You can find various software applications on the market for printing shipping labels. However, the downside of using third-party software is that you need to import your orders into the system for printing a label unless it comes with an automatic import feature.
5) Use an Integrated Software
Using an integrated software application to create and print shipping labels.
An integrated tool allows you to receive and ship your orders by attaching the relevant labels. You do not need to export and import the shipping details to the software.
Also, you can print labels using the software without logging into the application. An advanced software solution integrates all the major carriers, such as FedEx, UPS, and others.
The shipping label formats of the major shipping carriers are already in the system and you only need to choose the relevant label for a carrier and take a printout.
Handwritten vs. Printed Shipping Labels
If we compare handwritten and printed shipping labels, printed labels are usually more efficient and professional for high-volume shipping because of their speed, clarity, and barcodes.
Handwritten labels are more suitable for occasional, low-volume shipments where quick labeling is required. However, it can be time-consuming and error-prone when shipping large orders.
But in both cases, you need to include key details such as the recipient’s address, sender’s return address, a tracking number, and a barcode.
You may, however, still need to handwrite some information on a printed label like a signature or specific delivery instructions.
Key Differences:
Speed: Printed labels are easier and faster to generate, especially when with a dedicated label printer. Conversely, handwriting each label can take way more time, particularly for large volumes.
Accuracy: Printed labels containing pre-generated barcodes minimize the risk of errors in address details, while handwritten labels can result in misread addresses or incorrect details.
Cost: Although individual printed labels may cost marginally more than the paper used for handwriting, the time saved for printing in large quantities can offset the cost.
Professionalism: Printed labels with a brand logo and uniform format usually look more professional compared to handwritten labels.
When to Use Handwritten Labels:
Low-volume, occasional shipments: If you need to print a few labels occasionally, handwritten labels may be sufficient.
Last-minute deliveries: In urgent situations like last-minute deliveries where printing a label could be time-consuming, handwritten labels can be an easier option.
When to Use Printed Labels:
High-volume Shipping: When shipping large volumes of packages, using printed labels will be more efficient.
Ecommerce Fulfillment: Online stores typically depend on printed labels with barcodes for order tracking.
Complex Address Details: If addresses are in detail or include special delivery instructions, printed labels provide clarity.
Common Mistakes to Avoid
Flawless shipping labels are essential for efficient logistics.
Labels work as navigators, ensuring the undeterred movement of packages through the vast global networks. However, even a minor mistake, like incorrect spelling, or missing parcel details can delay the delivery.
These errors not only result in delays and soaring costs but can also lead to customer dissatisfaction and loss of revenue.
Here are a few most frequent shipping label errors that you need to avoid:
1. Wrong Printer Settings or Label Size
One of the common issues crops up from using the wrong printer settings or label sizes. It leads to misaligned labels or missing important details.
Errors like these can affect all types of labels, starting from automatic shipping labels to E Ink labels, and RFID shipping labels.
Solutions and Measures:
Appropriate Printer Settings: Make sure your printer settings match the right label type and appropriate modes for thicker or specialty labels.
Ensure Correct Label Size: Make sure the label size is correct to avoid sizing errors that can affect scanning, especially with RFID or E-Ink labels.
Test Run: Do a test run by printing on standard paper to check alignment and size before printing your actual labels.
2. Labels That Fail to Stick Properly
Labels not sticking to parcels are a common issue. It often happens due to poor adhesive quality, unclean surfaces, or using inappropriate label materials for the package.
When labels come off during transportation, the risk of parcels getting lost or undeliverable goes up. This can delay deliveries and affect customer satisfaction.
Solutions and Measures:
Pick High-Quality Labels: Always use labels with a strong adhesive that sticks well to your packaging material, whether it’s cardboard, plastic, or another material.
Use the Right Label Material: Choose label materials ideal for a parcel’s surface texture and resistance to moisture or temperature fluctuations.
Prepare the Surface: Before attaching a label, ensure the parcel surface is clean, dry, and free from dust or grease.
3. Incorrect Details
Another common mistake in shipping labels is missing the required details or including incorrect information. It could be wrong addresses, inaccurate weights, or service codes.
These mistakes can cause parcels to be delayed or sent to the wrong destination. In some cases, carriers may also charge additional fees for rerouting shipments.
Solutions and Measures:
Review for Accuracy: Before printing, carefully review all the details, including addresses, package weight, shipping codes, or instructions.
Use an Address Validation Tool: Many carriers offer address validation tools to verify addresses against postal service databases. These tools can help identify and correct mistakes before printing labels.
Initiate to Correct Label Errors: If a label has incorrect or missing information and the parcel is already in transit, contact the carrier right away.
4. Not Using Weather-Proof Labels
Not using waterproof or weather-resistant labels while shipping exposes to rain, snow, or humidity, and can compromise the label’s durability.
Exposure to harsh weather conditions can make labels unreadable, erasing key shipping information and barcodes.
Prevention and Solutions:
Use Weather-Resistant Labels: Select labels specially designed to withstand harsh weather conditions. These labels are made with water-repellent and tear-resistant materials, ensuring the shipping information stays intact.
Assess Shipping Conditions: Before shipping, assess whether the parcel will go through adverse weather conditions. This will help you choose the right label material for the journey.
Additional Protection: For harsh conditions, use additional protection such as plastic sleeves or waterproof packaging to keep the label and the package secure.
5. Issues with Color and Print Quality
Issues in color and image resolution can affect the uniform appearance of shipping labels. This not only impacts the brand’s image but also compromises functions like barcode readability.
Prevention and Solutions:
Use a Professional Printing Service: For sending shipments, you can use professional label printing software or hire professional printing services. This will ensure high color resolution and quality standards.
Buy Quality Printing Equipment: If you print in-house, invest in a high-quality thermal printer that can produce clear, high-resolution images.
Use Standardized Color Codes: Use standardized color codes like Pantone, for branding purposes to achieve uniformity across all printed shipping labels.
Tools and Templates for Creating Shipping Labels
The right tools and template for generating shipping labels can have a significant impact on your shipping process.
Here are a few top tools and templates for creating shipping labels:
Tools
For printing shipping labels, you can use shipping label software or templates from shipping carriers, or a regular printer to make shipping labels.
Shipping Label Software
Maestro Label Designer: It is a program designed for label design and printing.
Veeqo: Veeqo is a shipping software option that helps small businesses generate labels in bulk.
Shippo: A third-party platform that enables businesses to print labels.
Shopify Shipping Label Generator: This tool is ideal for eCommerce stores using Shopify as their platform. It easily integrates with your store and produces labels that meet all the conditions.
Shipping Label Templates
Sendcloud Free Shipping Label Template: You can use the free Sendcloud template online template to make shipping labels. You can generate labels on A6 sticker sheets.
Avery Shipping Label Template: Avery free templates are designed for printing label sheets. These templates work with popular word-processing software and allow users to create customized shipping labels with ease.
Printers
If you regularly send a few parcels a month, you can use a quality printer that can download label templates online and print from there.
You may also need to buy special adhesive labels from an office supplies store.
Online Label Creator
Reputable website Canva offers a library full of ready-to-use label templates that you can personalize.
You can even upload your own branding logos, images, and artwork.
Microsoft Word
You can make label templates using Microsoft Word.
Step-by-Step Guide to Making a Shipping Label
To make a shipping label from scratch, you need maximum personalization options and control over the format. Here are the steps:
Select Your Software: Common options are Adobe Illustrator, Canva, or Microsoft Word.
Set Dimensions: In the beginning, set up the dimensions or correct label size of a new document. Standard labels usually measure 4×6 inches.
Design Elements: Include crucial fields such as sender and recipient addresses, barcodes, logos, or branding colors.
Adhere to Carrier Specs: Ensure all the design elements comply with your carrier’s label specifications.
Preview and Correct: Before printing, preview your label to ensure all the areas in the label are correctly aligned and visible.
Save for Printing: Export your label design in a print-friendly format like PDF to maintain quality.
Best Practices for Label Placement and Packaging
Your label’s placement on your packaging plays a key role in developing a connection with your customers.
Here are a few best practices for label placement and packaging:
Placing at the Center
Placing your shipping label at the center of your parcel can make it more visible. Keep in mind that the center is not only the middle of an object; it’s the heart of your parcel’s data visibility.
Make It Symmetrical
Symmetry pleases the eye and brings a balance. By placing your label symmetrically, you can make the alignment of your label easy to notice.
Think About the Shipping Process
Thinking about the shipping process when placing your shipping label is another packaging best practice. Your label should be visible and readable.
Attach the labels with clear, waterproof tape to shield them from rain, snow, and physical damage during transit.
Conclusion
Summarize the key points discussed in the blog
Shipping is an essential part of the eCommerce selling process, and one of the crucial elements of this process is shipping labels.
Just like choosing the right carrier, generating and using the right shipping labels will make your business more efficient.
Regardless of whether you are just starting your eCommerce business or already an established one, you need to print and use accurate shipping labels in your packages. For this, use the right tool, template, and dimensions, and follow the best practices to avoid bearing additional costs and delays.
FAQs
Q1: What information is required on a shipping label?
Ans: The information required on a shipping label include: the sender’s and recipient’s full name and address, the parcel weight, a tracking number, and the shipping date. Sometimes there are additional details like a phone number for the recipient.
Q2: Can I handwrite a shipping label, or is printing mandatory?
Ans: Although you can handwrite parts of a shipping label, printing is usually mandatory as it ensures clarity and accuracy, especially for the barcode that the carrier scans during shipping.
Q3: Are there standard formats for shipping labels?
Ans: The standard format for a shipping label is a 4×6 inch size, which is the industry standard.
Q4: How should I label a package with multiple items inside?
Ans: When labeling a package with multiple items inside, list the individual items on the label. Do it either by writing the item names or using item codes, alongside the standard shipping details like sender information, recipient address, and tracking number.
Q5: Can I use any side of the box for placing the shipping label?
Ans: You cannot use just any side of the box for placing a shipping label. It’s best to attach it on the largest, flattest side of the parcel to ensure the carrier can easily scan the label.
Q6. How can I protect the shipping label from damage during transit?Ans: You can protect the shipping label from damage during transit by attaching it to a sturdy, smooth surface on the box. Use a plastic sleeve to cover the label, and make sure the label is attached with strong tape.


- Why Basic Shipping Apps Fail at 10,000 Orders a Day? - March 3, 2026
- Best Shipping Companies in Canada - February 25, 2026
- How to Analyze Your Shipping Invoice (And Stop Overpaying in 2026) - February 19, 2026


